Flybuy Merchant Portal 101
An overview of the Flybuy Merchant Portal
Table of Contents
Flybuy Pickup Merchant Portal Projects Notifications Sites Configurable Settings Customer Facing Notifications Staff Dashboard Notifications Premises SMS Notifications Pickup Areas Staff Dashboard Site Info View OrdersThe Flybuy Merchant Portal is the service portal for your brand’s Flybuy Pickup project encompassing: customer messaging, configuring settings, pickup areas and more.
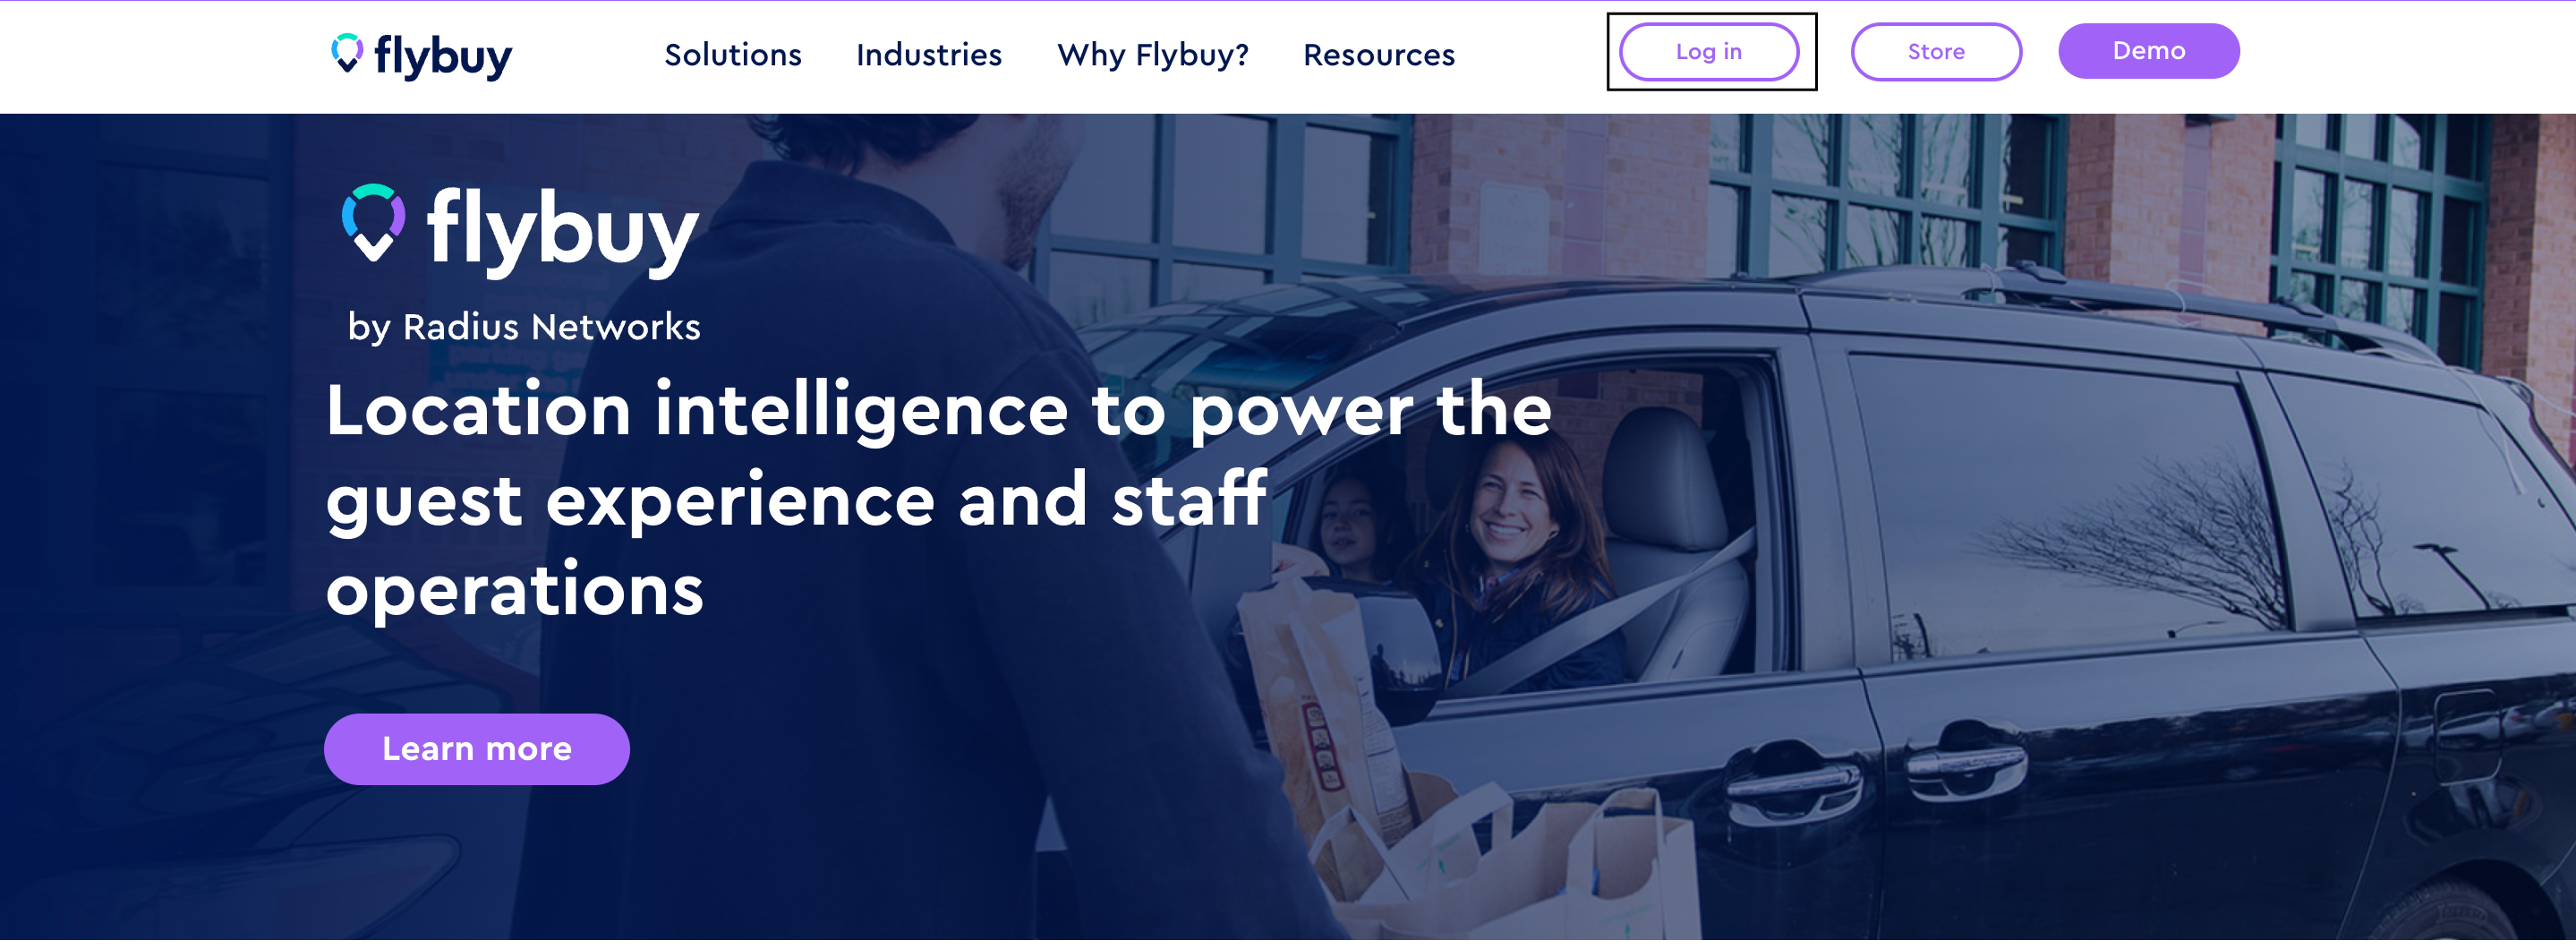
To login, go to flybuy.com and select the login button. From there, you will be prompted to login to an existing account or create one if you are a new user.
Flybuy Pickup Merchant Portal
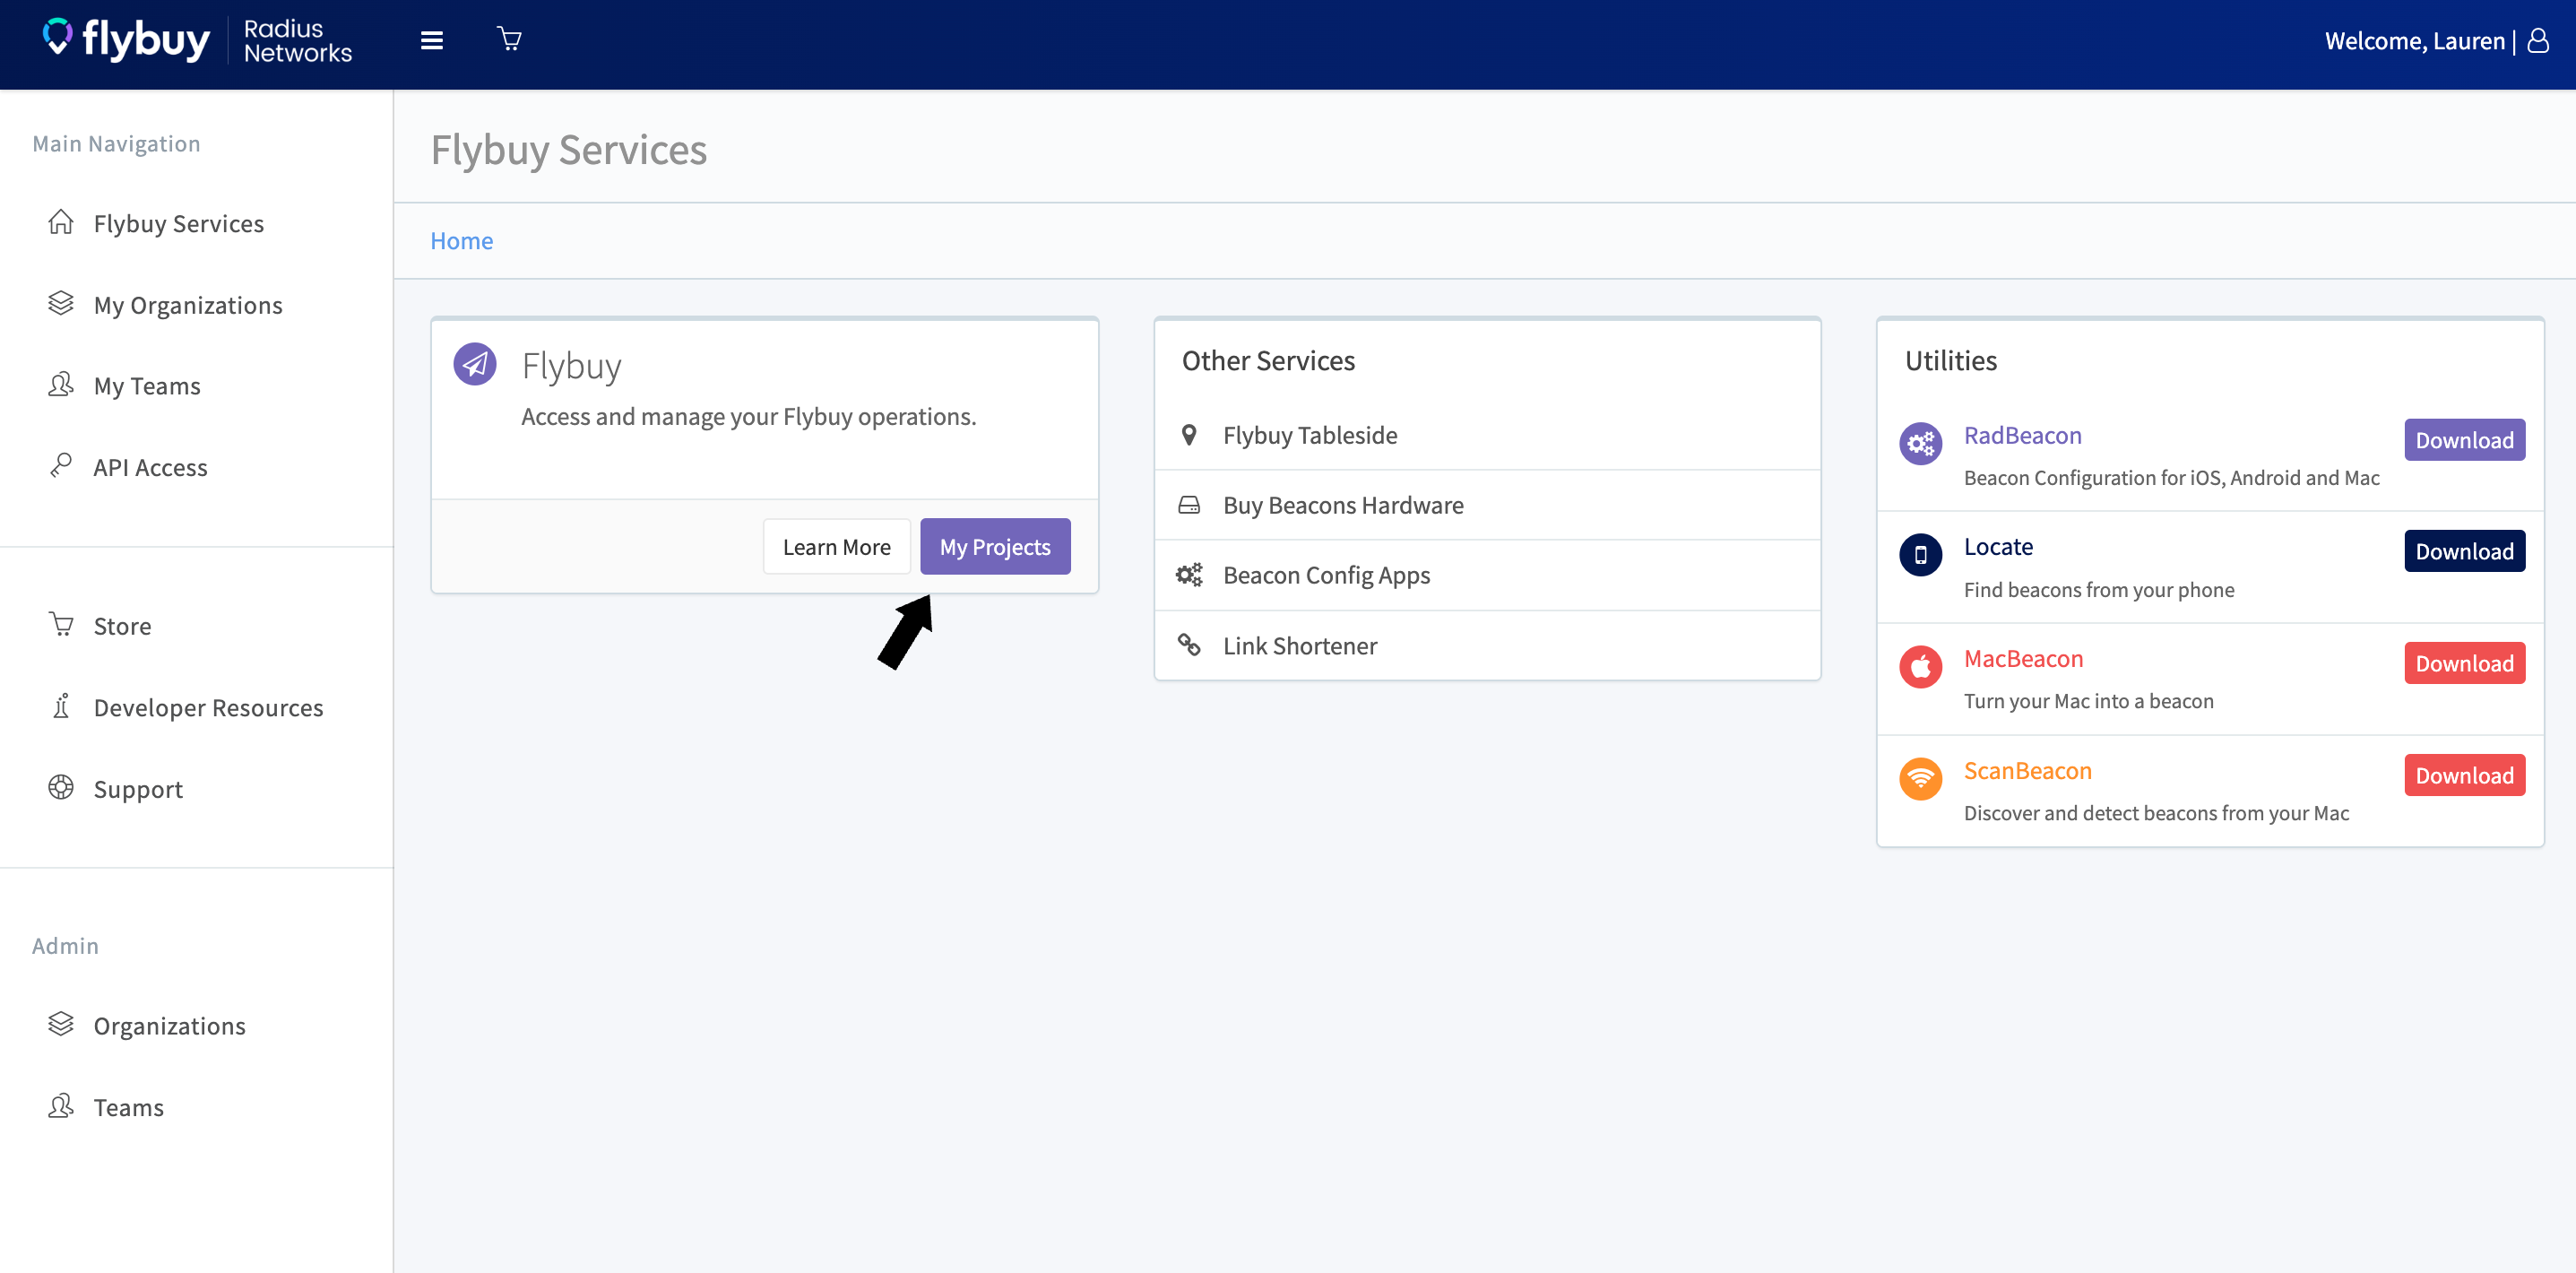
The main area you will utilize on the home page is the Flybuy Pickup section. Here, click on the 'My Projects' button to access your projects.
Projects
This page will show your brand’s projects with Flybuy. The project specifically is where your sites are configured with the Flybuy Pickup experience. To access your projects, select ‘Manage Project’ on the one you would like to view.
Note: Sandbox projects are utilized for testing while projects with your brand name typically have sites in production. If you have any questions on the projects you have access to, please reach out to your Customer Success Manager and/or email customersuccess@flybuy.com.
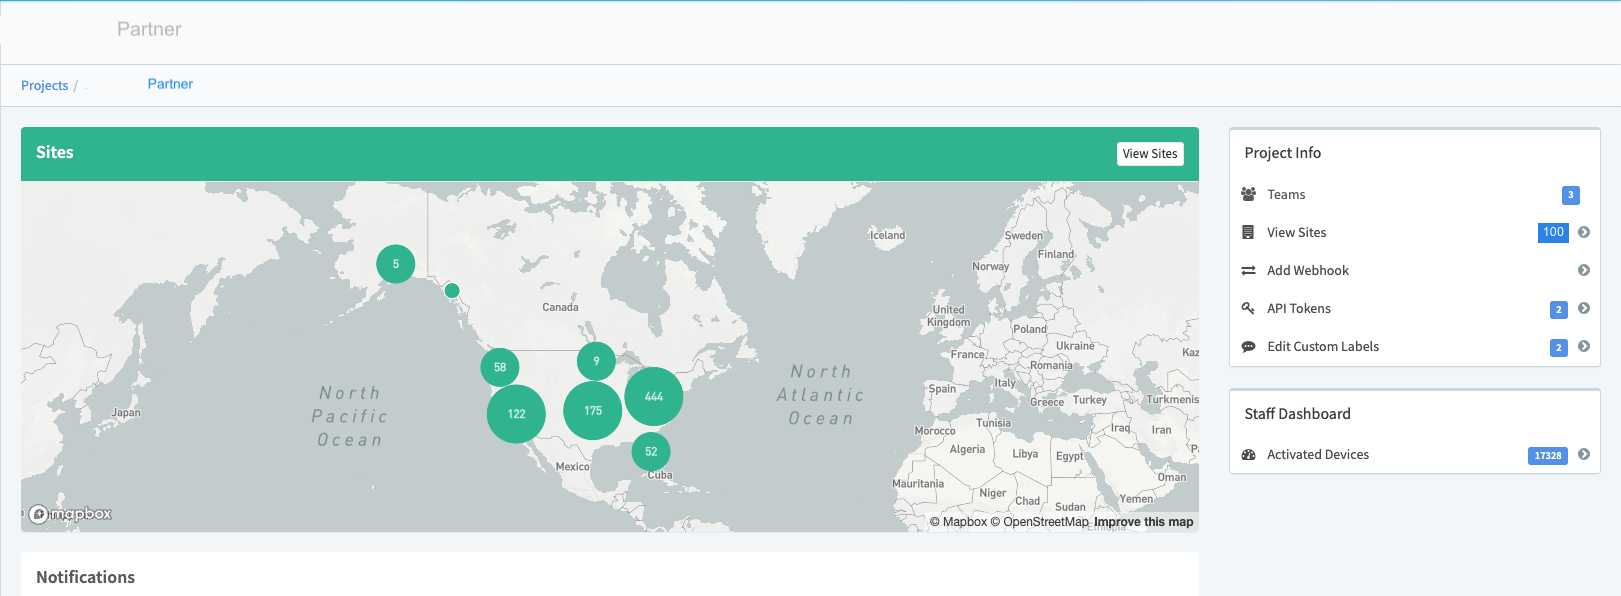
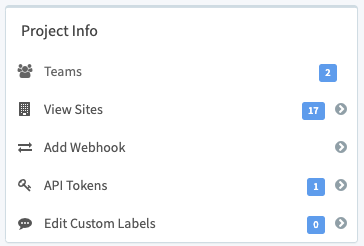
The home page of each project includes: map of the site locations, notifications (customer facing messaging), teams, project info, and staff dashboard activations.
Notifications
Notifications refer to the customer facing massaging with the Flybuy pickup experience. Messages can be created based on pickup type (in store vs. curbside) and based on the customer event (Order Created, Order Ready, Customer Arrived). The messages can be customized to match your brand’s nomenclature and voice. Please note these messages cannot be longer than 120 characters. You will work closely with your Customer Success Manager to configure this messaging.
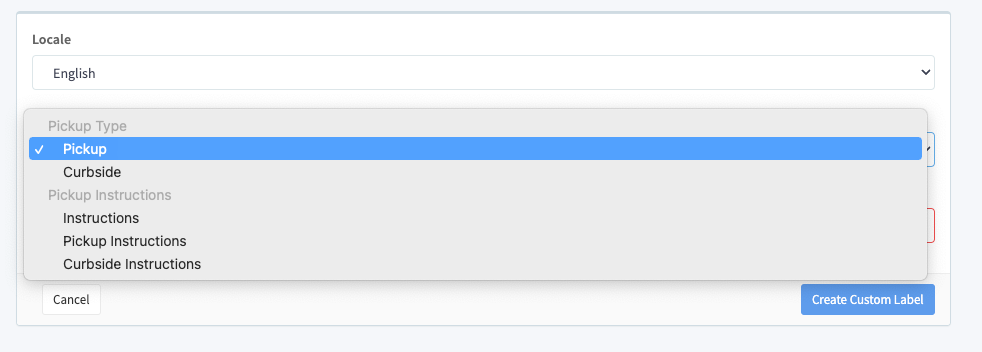
If you utilize different terminology for pickup types (example: In-Store Pickup rather than Pickup), these can be changed via ‘Edit Custom Labels’ on the right hand side of the Project homepage. This is also where Pickup Instructions can be customized via pick up type.
Sites
To access sites, you can either click on a specific site in the map view on the project home page or view the site list by selecting either the ‘View Site’ button on the upper right hand corner of the map or under project info.
Sites are searchable by their Name or Site Number. To add an additional site, click on the ‘Add a Site’ button in the upper right hand corner of this page. Additional information on the site list include, the store address, the operational status and the Customer SMS notifications. Please share with your dedicated Customer Success Manager the sites you wish to include in the Flybuy Merchant Portal.
Click on a site to view the site level. The boxes at the top of the site page show the number of orders and the average wait time for the day. The premise and pickup areas for the site will be displayed under these 2 boxes.
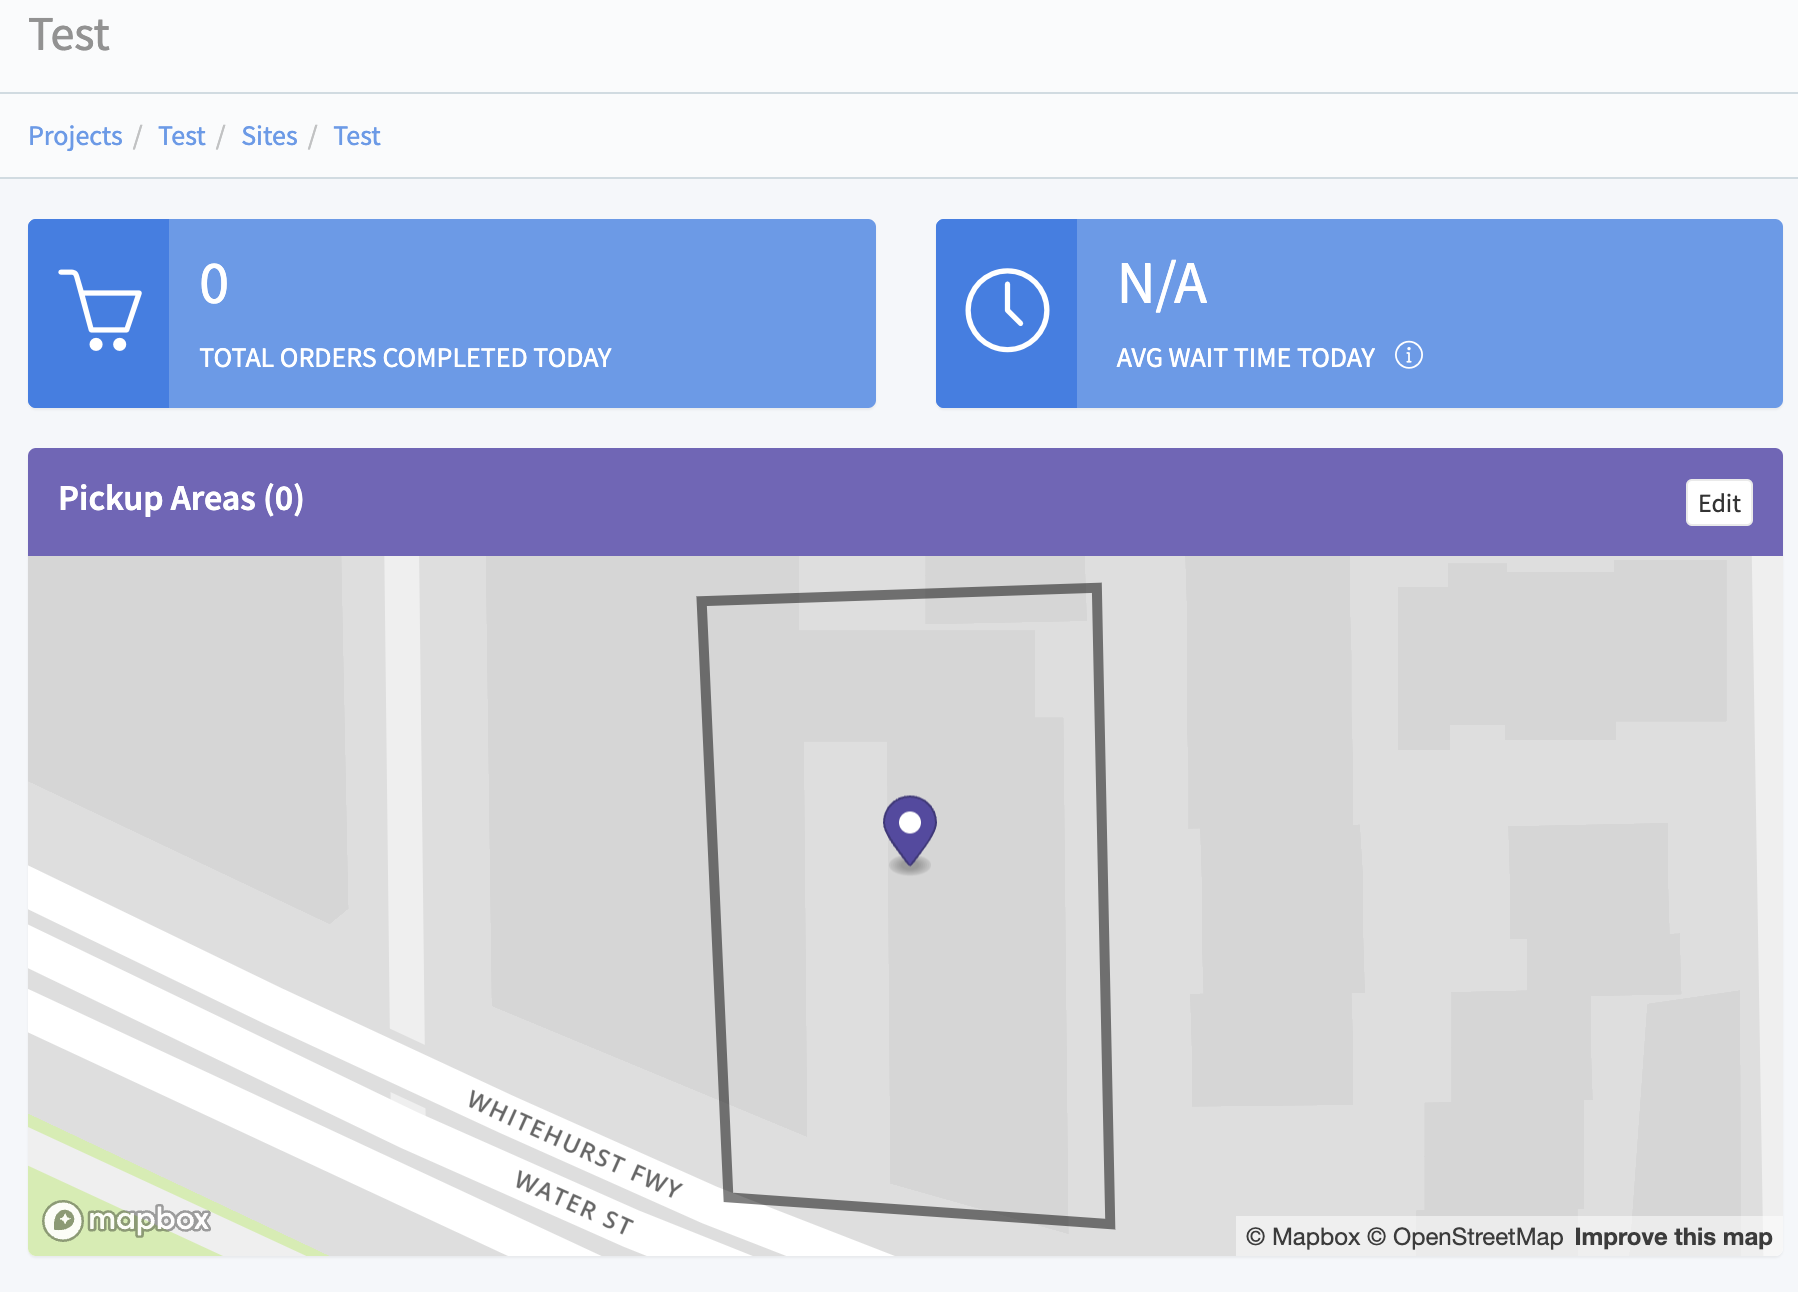
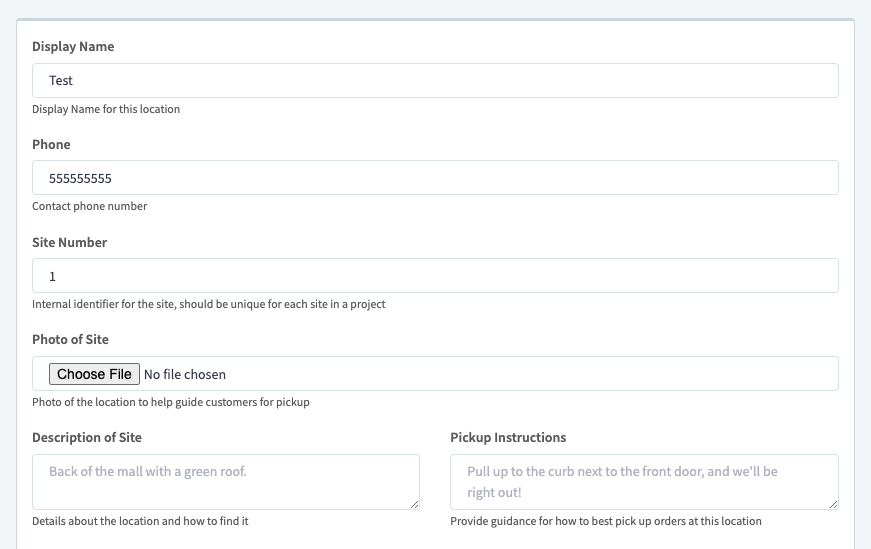
Each site will include the site name, site phone number, and partner identifier. It is recommended that a site specific photo is included along with a description of the site and pickup instructions.
Configurable Settings
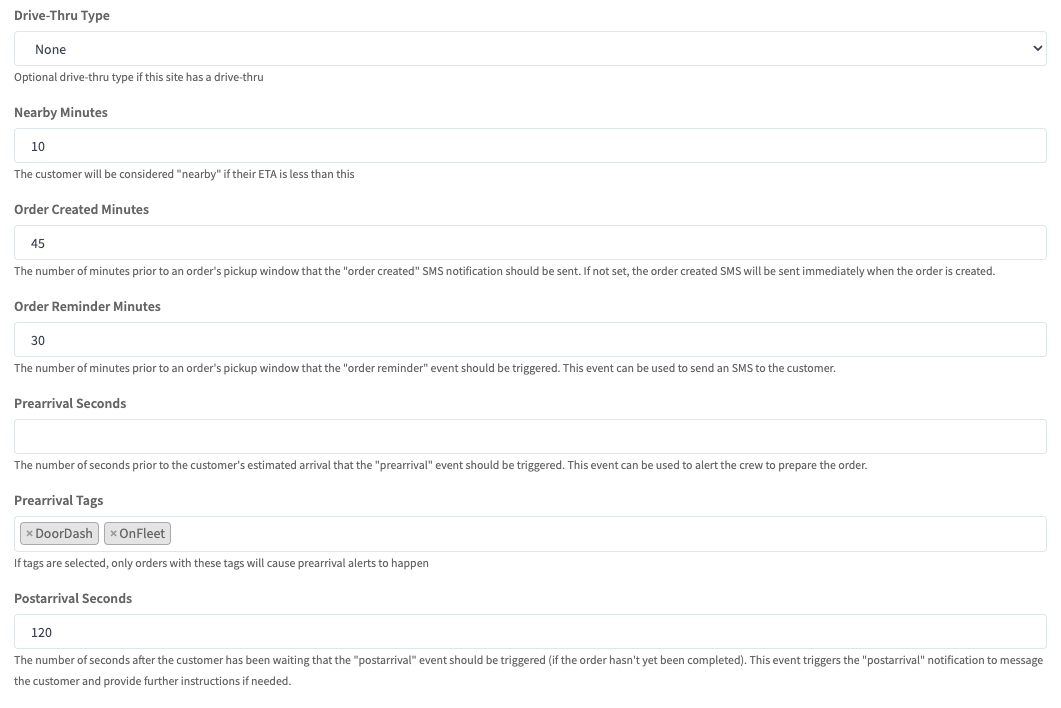
Each site has configurable settings that are configured when editing site details. These settings encompass both customer facing notifications and staff notifications on the dashboard. Your Customer Success Manager will work with your team to configure these settings!
Customer Facing Notifications
-
Order
Created Minutes: This notification triggers when the initial Order Created Message will be sent to a customer. When setting this notification with partners consider:
- How far in advance do customers place orders?
- Are orders typically for immediate pickup?
- How far in advance are customers likely to leave to travel and pick up their order?
- Order Reminder Minutes: This is a follow up message sent to a customer if they do not tap the link in the initial Order Created Message they received.
-
Post-arrival
Seconds: The notification is triggered after a customer have been waiting for a configurable amount of time to let the customer know the store is aware of their arrival and will be out with their order. When configuring this consider:
- What is your target wait time?
- What is your current wait time?
- How long should a guest be waiting without any acknowledgment that the store is aware they are still waiting?
Note: You will work closely with your dedicated Customer Success Manager to configure these.
Staff Dashboard Notifications
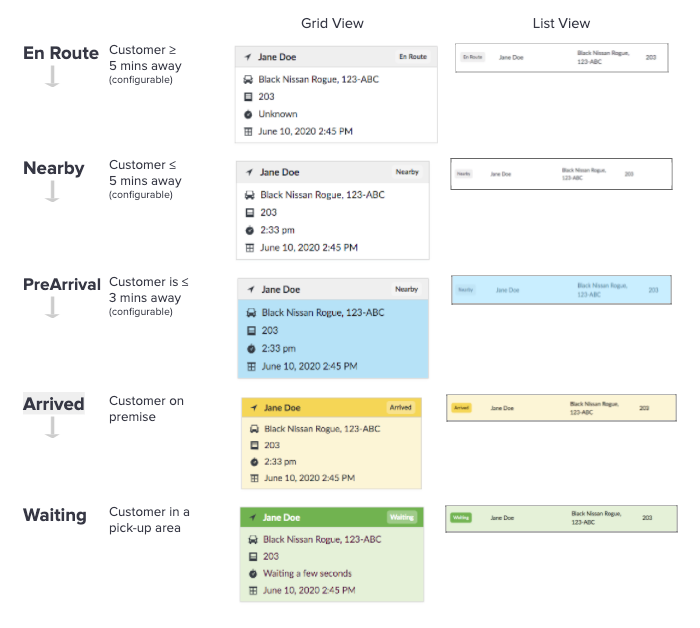
- Nearby Minutes: This is when the customer state on the dashboard will change from ‘En Route’ to ‘Nearby.’ Consider the typical make time for orders and when staff need to take action to have the order ready for the customer’s arrival. To enhance this notification, configure this alongside the Prearrival Seconds.
- Prearrival Seconds: This is the number of seconds prior to a customer’s arrival that an event is triggered. It is associated with the order changing to blue on the staff dashboard.
- Prearrival Tags: Tags are associated with orders that meet specific criteria and require additional attention from staff. These can include speciality menu items, delivery providers, items often forgotten with orders, etc.
Note: You will work closely with your dedicated Customer Success Manager to configure these.
This provides an overview of the state changes of the customer on the Flybuy Staff Dashboard.
Premises
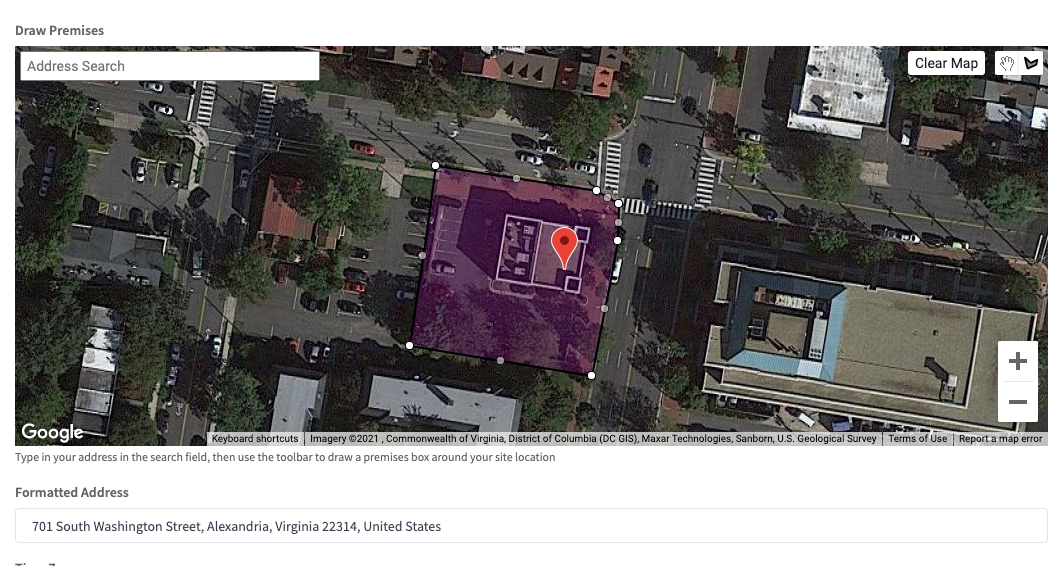
The premise area is created under ‘Edit Details’ as well and this triggers the ‘Arrival’ phase on the Staff Dashboard. The Flybuy team will configure this for each site and confirm that this is set up correctly with your team!
Ensure the timezone for the site is correct.
SMS Notifications
This is the last item configurable in the site details. Your Customer Success Manager will update the messaging accordingly for your sites! When sites are live with Flybuy, the Customer SMS notifications will be set to ‘Automatically send text notifications for all order.’
“Don’t send text notifications automatically” is utilized prior to a site being set live or when a site is paused.
“Only send text notifications for certain numbers” is used for testing purposes. Phone numbers can be whitelisted by selecting ‘Add Phone Number’ and only the numbers listed there will receive Flybuy SMS messages when this is selected.
Pickup Areas
The pickup areas trigger the ‘Waiting’ notification on the Staff Dashboard. The Flybuy team will configure these for each site and can make any necessary edits! For those with access to the Merchant Portal, when drawing a new pickup area, it must:
- Include a minimum of three parking spaces
- Must be drawn within the premise area
- Not overlap with any other pickup areas
To add a new area, click edit, on on the Pickup Areas bar in the Site level home page and then hit New Area.
When adding a new area, name the pickup area in accordance with the partners desired label structure (for example: Curbside Zone 1), select a color and select create area at the bottom of the page. Linked here is a video showcasing how to accurately draw a pickup area.
To edit any existing pickup areas, select the pickup area you want to edit in the Pickup Areas view.
Staff Dashboard
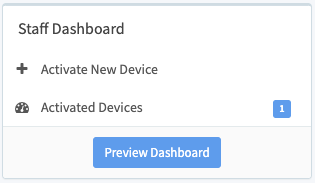
Under the Staff Dashboard section of the site page, new dashboards can be activated and you can view all activated dashboards for this site. By selecting ‘Preview Dashboard’ you can also view the site’s dashboard.
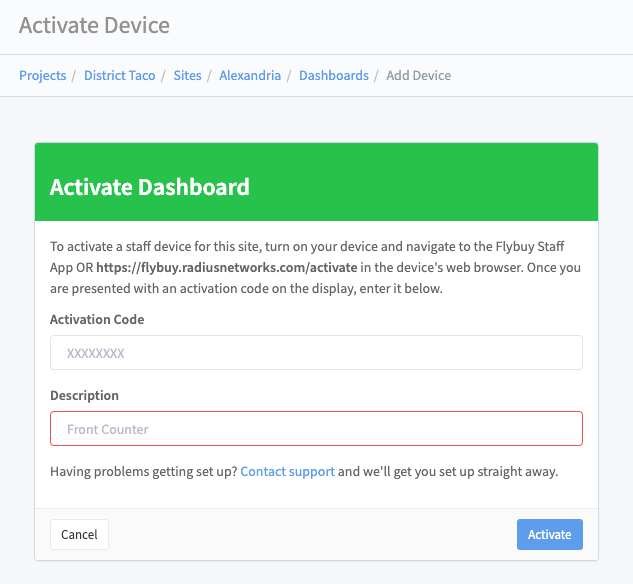
Select ‘Activated Devices’ for an expanded view of all active dashboards. This shows a description of the device, when it was last accessed and when it was last seen online. To activate a new device, click ‘Activate New Device’ in the upper right hand corner of this view or on the site home page. To activate a device, navigate to the Flybuy Staff app or proceed to https://flybuy.radiusnetworks.com/activate in the device’s browser.

To activate the device:
- If you have access to the Merchant Portal, select 'Activate New Device' and input the activation code on your browser or in the Flybuy staff app in the Activation Code space. Include details about the device under the description. It is recommended in the description to also include the date activate (example: iPad 11/18/21)
- Email your activation code to pickup-support@flybuy.com along with your Brand name, Store name, Store Number and location.
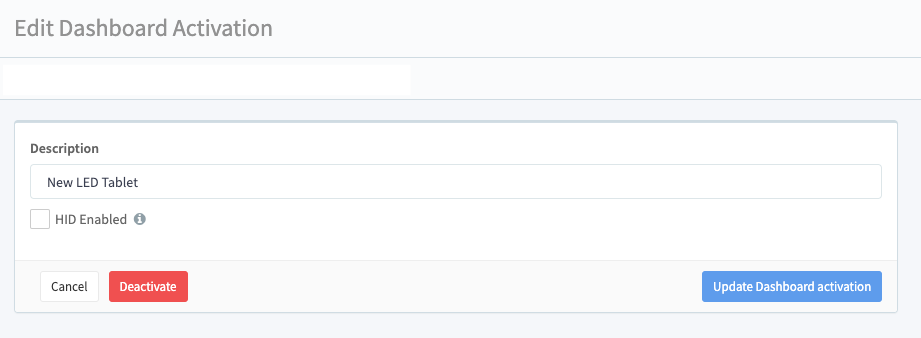
Selecting an activated device allows you to enable or disable HID and deactivate the device.
Site Info
Site info is located below the Staff Dashboard. This includes:
- Customer notifications: Notifications are set at the Project Level and can be customized as the site level.
- View orders: This is where all site level orders can be viewed. These are stored for 30 days.
- Edit Custom Labels: Custom labels are set at the Project Level and can be customized at the site level.
- Edit Pickup Areas: This is an alternate way to access the configured pickup areas.
View Orders
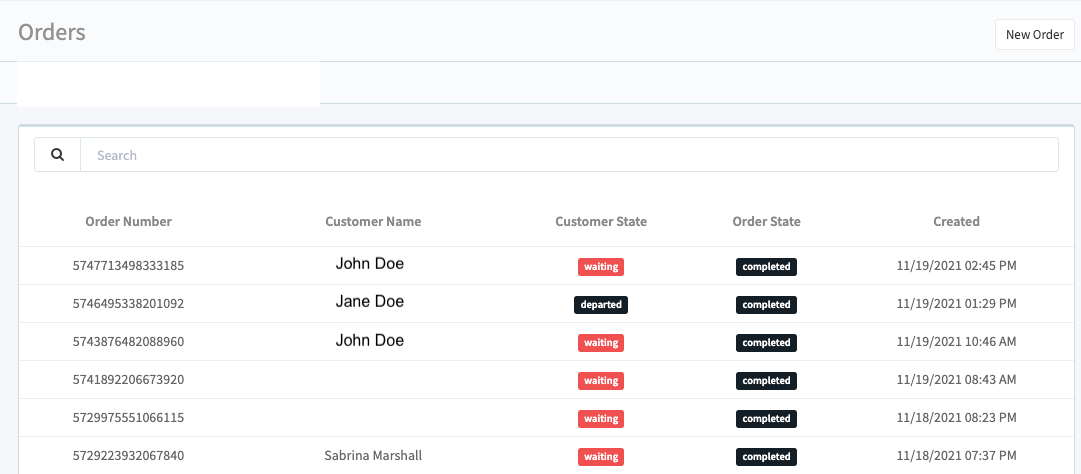
This shows all orders in the past 30 days. Orders are searchable by customer name and order number. This also shows the Customer State, Order State and time the order was Created. A new order can also be created by selecting “New Order” in the upper right hand corner.
Important Note: When capturing information for an order to investigate the Flybuy Merchant Portal, capture the site name and number, order number and customer name.
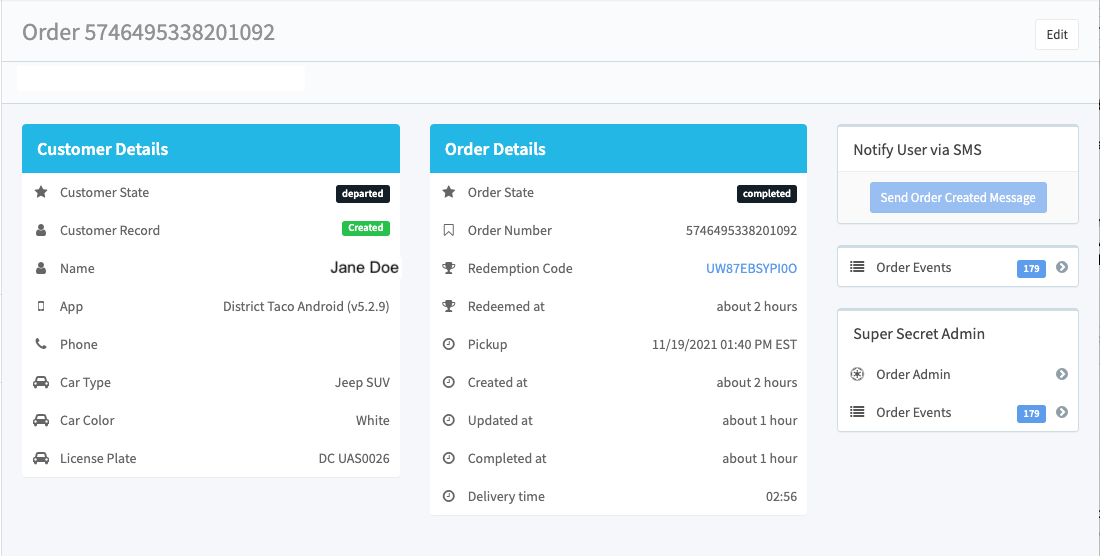
To view Order Details, click a specific order.
Viewing the specific order details provides an overview of the Customer Details and Order Details. Here, the order events can also be accessed. If the order has not been redeemed, the Order Created message can also be initiated here. This is often used during testing. This button will be greyed out if the order is redeemed as you can see below.
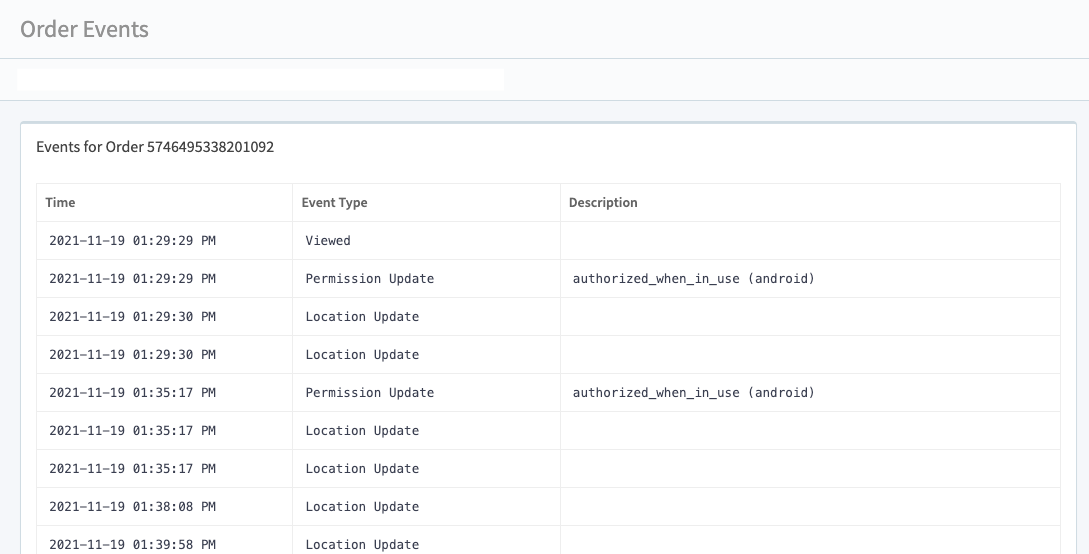
Order Events provides the sequential events that occurred as the customer traveled to the location. This is the first place to review if there is an issue with the order to see what occurred with Flybuy.
These are the basics of the Flybuy Merchant Portal! In addition, the Flybuy Customer Success team (customersuccess@flybuy.com) and Flybuy Support team (pickup-support@flybuy.com) are always available to assist and answer any questions related to Flybuy pickup and the Merchant Portal!
